I Hacked Vicks Vapor Rub…

Please read this disclaimer.

I Hacked Vicks VapoRub

I have been surprised with all the feedback I have been getting about my vapor rub lately. I never thought it would be so popular. I had whipped up a quick batch last year and immediately gave it away to friends and family members. I never received feed back until now and boy is it nice to hear how well it has helped other families. I decided while filling yet another order I would share how I made it with the world!

The best part of JEM’s Vapor Rub is that it doubles as a Neosporin or Mel-a-gel. Not only will it sooth your congestion you can also use it on cuts, scraps and other booboo’s as well. We have even used it to help bug bites stop itching. Okay I lied the BESTEST part about this vapor rub is that it is petroleum and other harmful chemical FREE!

Now normally I would say the Essential oils are optional but for this recipe they are NOT optional. The essential oils are what makes the vapor rub, vapor rub. I have researched what goes into Vick’s and which oils have healing properties that helps with congestion. Of course you could always add to this list, but I would seriously recommend not taking any of these out.

DIY Vick VapoRub

What you need to make an all natural vapor rub:

  • 2 ½ TBSP Coconut oil
  • 2 TBSP Bee’s Wax
  • ½ TBSP Caster Oil
  • 1 ½ TBSP Aloe Jelly
  • 20-30 Drops of Camphor Oil
  • 40-50 Drops of eucalyptus Oil
  • 30-40 Drops of Tea Tree Oil
  • 20-30 Drops of Peppermint Oil

Steps:

  1. In a double boiler melt coconut oil, bee’s wax and castor oil together.
  2. As soon as the bee’s wax and coconut oil is melted turn off heat.
  3. Let cool for a few minutes and then add the Aloe Jelly. Mix well. REALLY WELL to get the jelly to mix with the wax and oils.
  4. Once Aloe is incorporated into the wax and oil mixture; add your essential oils. You want to let it cool some before adding the essential oils because they could lose their potency in high heats.
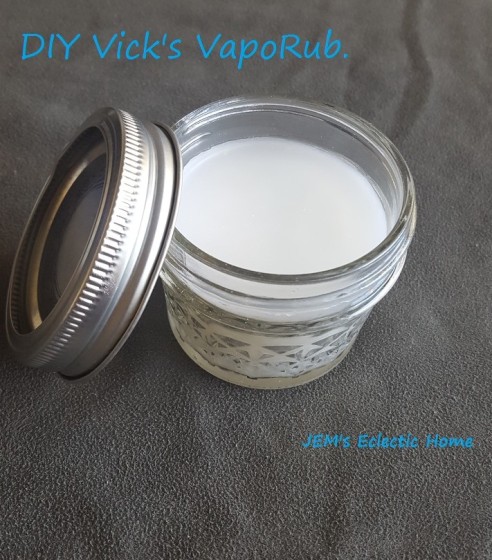
  5. Pour mixture into clean dry air-tight containers. Leave open until the vapor rub cools and hardens.

JEM's Vapor Rub** When doubled, the recipe will make three small 4 oz mason jars worth of vapor rub. **

Once hardened you can use it just like vapor rub. Apply to chest, back, neck, feet and even under your nose (no, not IN your nose silly). This vapor rub is safe for the whole family. When using it on babies I would suggest keeping it off of their face. (Just in case, you wouldn’t want anything getting into babies eye, nose or mouth) When my kids were babies I applied it to their feet and put socks on them. I still do this for Things 3 and 4 and even Mr. JEM when he’s feeling yucky.

If you don’t have time or the ingredients to make your own, check out JEM’s Eclectic Home Etsy store for a chance to have your very own JEM's Vapor Rub
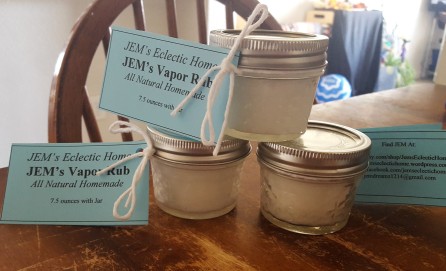
container of JEM’s Vapor Rub land right in your mail box right in time for cold and flu season.

I hope you enjoy this chemical free version of Vapor Rub. I know that my family does.

Check out my post…I Hacked Burt’s Bees Hand Salve for another DIY recipe.

Please read this disclaimer.

Namaste ❤

JEM

*Updated*I Hacked Burt’s Bees Hand Salve…

Please read this disclaimer.

My husband loves Burt’s Bees Hand Salve. Living in El Paso he has always used some sort of hand salve or lotion after washing his hands and showering. We have been dabbling with all natural cleaners and body products for about 5 years now. I make whipped body butters, but he doesn’t really like them. When I finally said no more “poo” lotions he started using Burt’s Bees Hand Salve. It was the easiest to find, since you can find it everywhere, and it is a texture he likes a lot. Burt’s Bees is kind of expensive though, running about $7 for a 3oz tin.

20140520_194004

Since his tour in Afghanistan he developed a red itchy skin issue on his arm, we think it is Eczema or Psoriasis. The “rash” only flares up every few weeks and slowly goes away. The hand salve keeps the rash from cracking and itching.

This weekend he ran out, just as his rash was reappearing. So, I suggested that we try to make him some. I already had most of what I imagined to be in a hand salve without reading the label or checking out Pintrest for recipes. Plus that would be much more cost effective. (We have this saying in our home “bet.ya.won’t”) So since he suggested I wouldn’t. I did.

As I looked up recipes on Pintrest I searched and searched but could only find ONE recipe for DIY Burt’s Bees hand salve. There were tons of DIY Chap Stick recipes but only one hand salve. I decided I would have to create my own, I researched which butters and essential oils are good for eczema and dry skin. I decided I would use all three of the butters I had on hand (Mango, Shea and Coco) since I used butters in my salve, the consistency is a bit stiffer than Burt’s bees salve, but is just as effective. My salve Cost me about $1.50 to $2.50 to make and this recipe filled two tins I had cleaned out to reuse, one was a 3oz Burt’s Bees tin and the other was a larger tin, my husband’s pipe tobacco came in. This means I saved more than $10 by making my own. Okay, let’s get to it.

20140520_074313

You will need containers to store your salve in, a double boiler and the following ingredients.

½ cup of Bees wax
1/8 cup Mango butter
1/8 cup Coco butter
1/4 cup Shea butter
4 tbsp Coconut oil
30-40 drops of Jojoba oil
½ tbsp Sweet Almond oil
2 tbsp Grape Seed oil
60 drops of Tea Tree oil

Start your water boiling in the double boiler on a medium heat. Place the bees wax and butters in the top part of your boiler, allow them to melt down. Once they are liquid add coconut oil, stirring until melted into the mixture. Now you can add all the other oils. Once your mixture is all melted you can turn the heat off and pour the mixture into your containers to cool. It does not take very long for the mixture to start hardening. If the mixture hardens before you have time to fill the containers, just melt it down again.

You could add other essential oils for a different scented salve, if you would like. I would suggest the following because they are good for your skin, but any pure essential oils would work.

Lavender
Lemon
Rosemary
orange
Chamomile
Tips:

If you do not have a double boiler, you can use a rice cooker, slow cooker, or larger pot of water with smaller pot or metal bowl. (Just be careful to not burn the mixture)

If you do not have the butters you could substitute them for coconut oil. This will change the consistency of the salve.

The more oils you add the softer the consistency will be.

Try to find reusable or recycled containers to help keep your cost down.

My favorite websites to buy supplies at are: Bulk Apothecary and Essential Wholesale & Labs.

If you like this post Check out I Hacked Vicks VapoRub…

Please read this disclaimer.

Homemade All Purpose Cleaner

Even as a child, I have always had this strong pull to save the earth. As I grew up and learned more and more about the lifestyle I wanted to live and teach my children; the green movement came out like a bang. Now it’s all about lessening your footprint, global warming is no joke. The Poles are melting faster than ever, as our ocean levels grow; our freshwater supply is shrinking.
I decided the only way to help was to go green; all natural, chemical free. Call it what you will, I wanted to do my part to keep my family healthy and help mother earth as much as possible.
We started by using store bought green cleaning supplies, the cheap ones are still full of junk and the actual chemical-free, all-natural kind are super costly. I needed to cut my budget and still stay true to cleaning as “green” as possible. I started to researched how to make my own cleaning supplies, first was all purpose cleaner, than laundry soap, body products and so on. I will not lie; I do not use only 100% homemade cleaning supplies, YET! I cannot seem to prefect dishwasher tablets/detergent, and with a family of 6 the dishwasher is a lifesaver. (Maybe I should start making the kids hand wash dishes, ha!) I figured I would share my first and most important recipe to me with you.
All purpose cleaner. We call it Green Cleaner because the first batch I added food color to make it green. But food coloring is also not good for you, so I decided to stop coloring it. I based my recipe off of this article Homemade Cleaning Products: All-Purpose Cleaner, this recipe was to make a small amount at a time, I don’t know about you but I don’t have time to make cleaner every few days. I wanted to make at least a month’s worth at a time, so I had to reconfigure the amounts, I played around with them a few times, using my knowledge of essential oils and the other ingredients. I finally started to notice we were getting sick less and less. My body felt better overall, I didn’t have to scrub as hard to clean stains off the counters, stove or tub or worry that my son sprayed his sisters in the face. I got it, I thought!UntitledNot only did it do what I wanted it to, the gallon juice jug I reused to make it in, was lasting us 4-6 months to get through. Not only was it lasting longer than store bought cleaners, it also cost me less than $2.00 to make. I call that a win-win! Wouldn’t you?2014-05-22 20.48.20All Purpose Cleaner Concentrate

  • ¼ cup washing soda
  • ¼ cup baking soda
  • ½ cup borax
  • Appox. 64 oz hot water
  • 1 cup liquid castile soap (I use Dr. Bronner’s magic soap)
  • 24-36 oz white vinegar
  • 50-60 drops of lavender Essential oil
  • 30-40 drops of tea tree Essential oil
  • 50- 60 drops of Eucalyptus essential oil
  • 50-60 drops of lemon Essential oil

Make sure you add the vinegar to dry products before you add anything else. Shake well, once the reaction stops foaming add half the water, then add the castile soap. Shake well. Fill the bottle the rest of the way with hot water. Now add the oils. Shake well.
Makes a gallon.
SHAKE WELL BEFORE EACH USE.
To fill a spray bottle with all purpose cleaner add half water half cleaner. Shake well.
The all purpose cleaner can be use in mop bucket for floors, just add a few ounces of cleaner then fill the bucket up.
Hints:

  • When using in a spray bottle add water before cleaner. The cleaner foams up less.
  • Essential oils are optional, but are not used only for their scent they have lots of properties to keep bacteria and other “germs” away. I wouldn’t use the cleaner without them.
  • Sometimes adding half the water before vinegar helps with foaming but can cause dry ingredients to clump.
  • Try to find reused or recycled bottles to help keep your cost down.

Do you have any homemade cleaner success stories?